

Automated Node.js Backend Deployment with Google Cloud Run and Cloud Build: A Step-by-Step Guide


Introduction
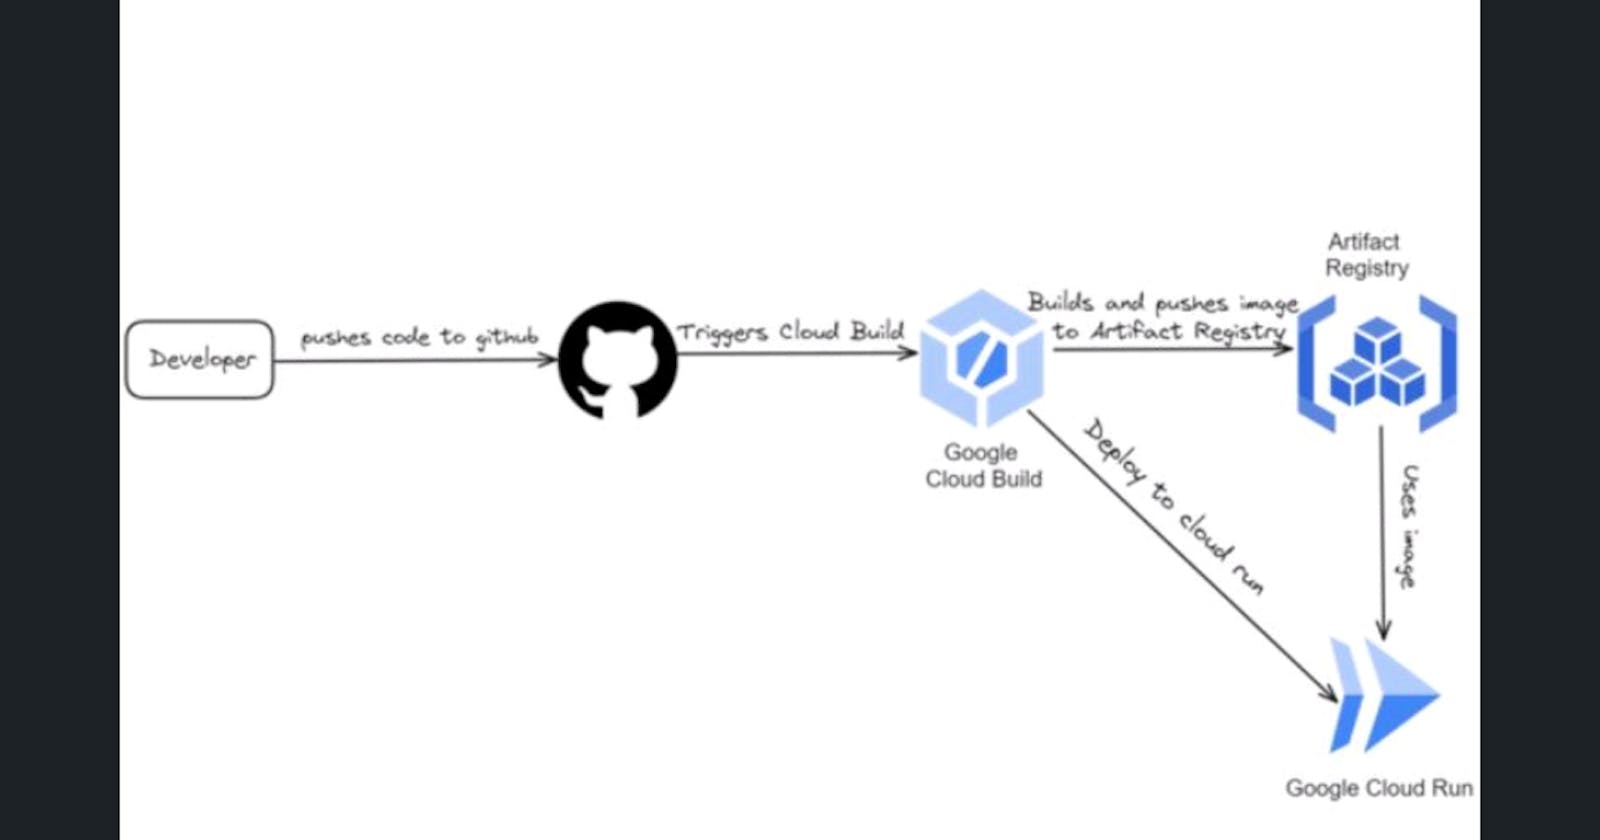
This guide will walk you through the step-by-step process of setting up an automated deployment pipeline for your Node.js backend. The services we will be using are Google Cloud Build, Google Cloud Run, and Artifact Registry.
Prerequisites
Before you dive into automating the deployment of your Node.js backend with Google Cloud Run, Cloud Build, and Artifact Registry, make sure you have the following prerequisites:
Node.js and Express.js: You should have an understanding of Node.js and Express.js, as these are the technologies powering your backend application. If you're new to these, it's recommended to get familiar with them through online tutorials and documentation.
Docker: Familiarize yourself with Docker, a containerization platform that allows you to package your application and its dependencies into a container. Docker is pivotal in containerizing your Node.js backend for deployment. Learn about docker here.
Cloud Run: Cloud Run is a managed compute platform that lets you run containers directly on top of Google's scalable infrastructure. You can deploy code written in any programming language on Cloud Run if you can build a container image from it. Learn about Cloud Run here
Cloud Build: Cloud Build is a service that executes your builds on Google Cloud infrastructure. Cloud Build can import source code from Cloud Storage, Cloud Source Repositories, GitHub, or Bitbucket, execute a build to your specifications, and produce artifacts such as Docker containers or Java archives. Learn about Cloud Build here
Artifact Registry: Artifact Registry provides a single location for managing private packages and Docker container images. It is similar to the docker hub. Learn more about Artifact Registry here.
Process
Write and develop your Node.js backend code on your local machine.
Push your code to a GitHub repository, making it accessible for version control and collaboration. The GitHub repo will be linked with Cloud Build to monitor for events.
When there is a change in the GitHub repo such as a pull request, push to the main branch or push to a certain branch cloud build will be triggered based on the specified trigger.
Cloud Build uses a Dockerfile to build your application and its dependencies into a container.
The resulting container image is pushed to Google Artifact Registry.
The containerized application is deployed to Google Cloud Run, creating a scalable and serverless environment for your backend.
Preparing Your Node.js Backend
For this guide, I have created a simple backend service using node.js and express.js. The server listens on a port and responds to the request accordingly. Below is the server.js file.
const express = require("express")
require("dotenv").config();

const app = express();
const port = process.env.PORT || 8080;

app.listen(port,()=>{
    console.log(`server listening on port ${port}`)
});

app.get("/",(req,res)=>{
    return res.status(200).json({message : "Cloud Run and Cloud Build Demo - CI CD Pipeline"})
})

app.get("/echo/:text",(req,res)=>{
    const {text}  = req.params;
    return res.status(200).json({message : "Echo Route",data : text})
})
Packaging Your Node.js Application
To containerize your Node.js backend, you'll need to create a Dockerfile. This file provides instructions for how Docker should build your container image. Below is an example Dockerfile for a Node.js application:
FROM node:16-alpine

WORKDIR /app

COPY . ./

RUN npm install

CMD npm start
FROM node:16-alpine: Sets the base image as Node.js 16 on Alpine Linux.
WORKDIR /app: Defines the working directory inside the container as
/app.COPY . ./: Copies local files into the container's
/appdirectory.RUN npm install Installs Node.js dependencies using npm.
CMD npm start: Sets the default command to start the application with npm.
NOTE: Create a file named ".dockerignore". so that the "node_modules" are not copied into the docker image.
# .dockerignore file
node_modules
.env
Setting Up Cloud Run and Cloud Build
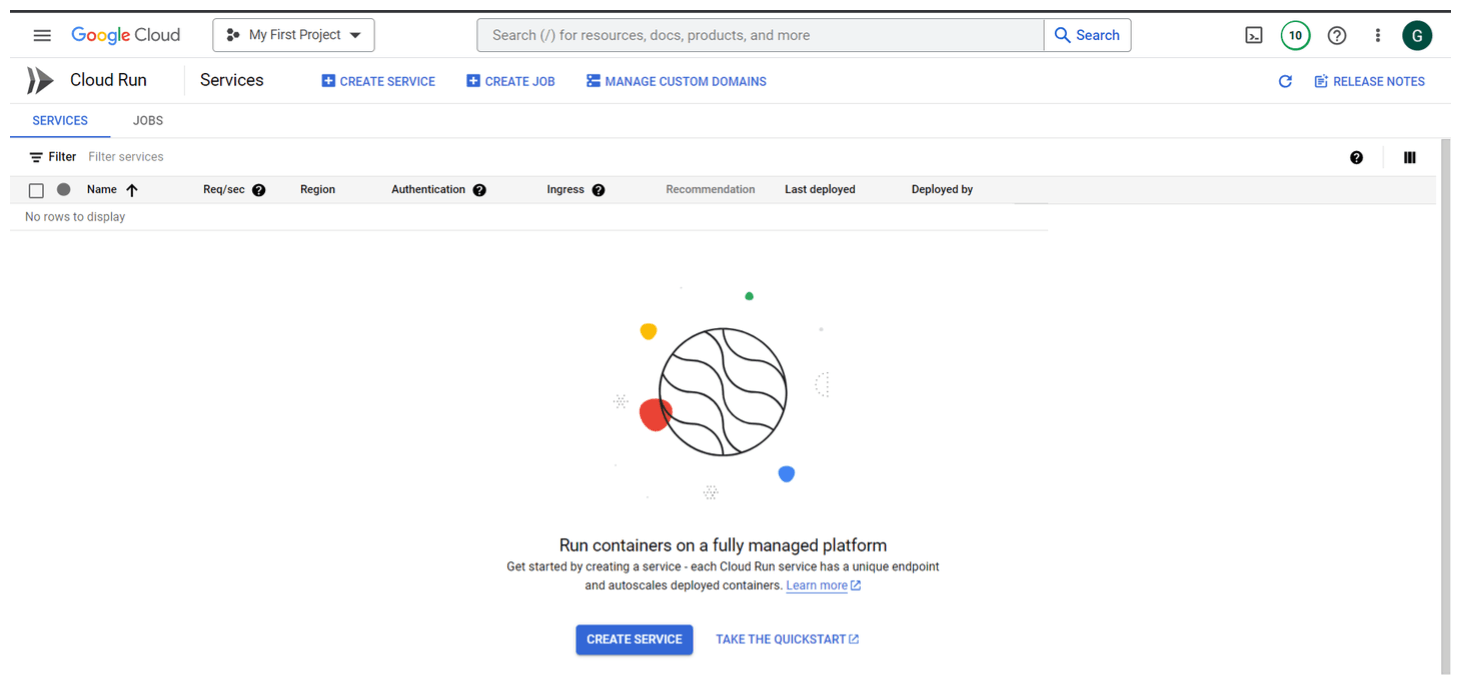
Go to Google Cloud Console navigate to Google Cloud Run service and click on "create service" at the top.
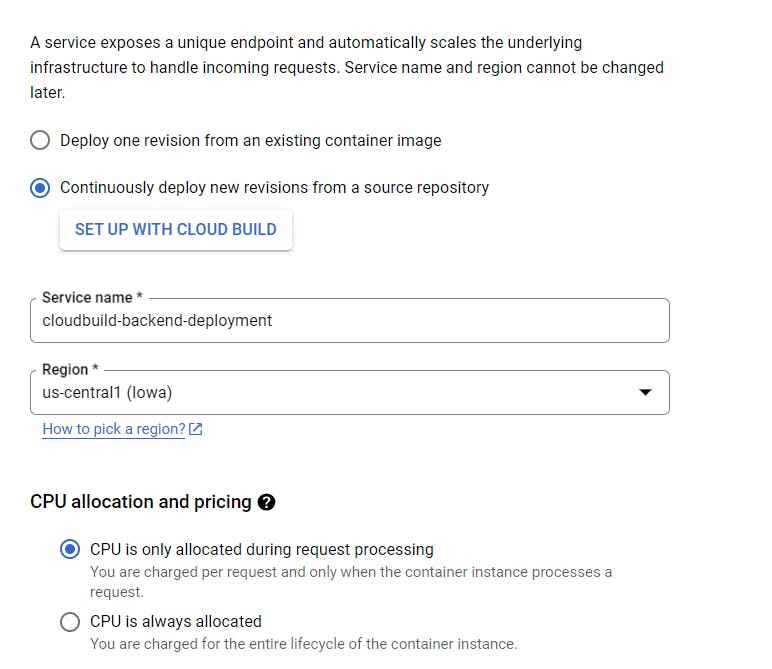
Click on Create Service and enter the required details.
Select "Continuously deploy new reivisions from a source repository"
Click on "SET UP WITH CLOUD BUILD"
Enter the Name and Region for the Cloud Run Service
After Clicking on "SET UP WITH CLOUD BUILD". A Dialog will appear on the right side to configure the Cloud Build Trigger.
Select the "Repository Provider" as "Github" or any provider of your choice.
Authenticate your Github account with Google Cloud Build.
Now you can see all the repositories in your account.
Select the repository, click on the checkbox and click on "NEXT"
In the "Build Configuration" step select the branch and build type as "Dockerfile" and enter the location of the file. Click on Save.


Change the other settings as shown in the below photos.
Change the Maximum number of instances depending on your requirements.
In Authentication click on "Allow Unauthenticated Users"
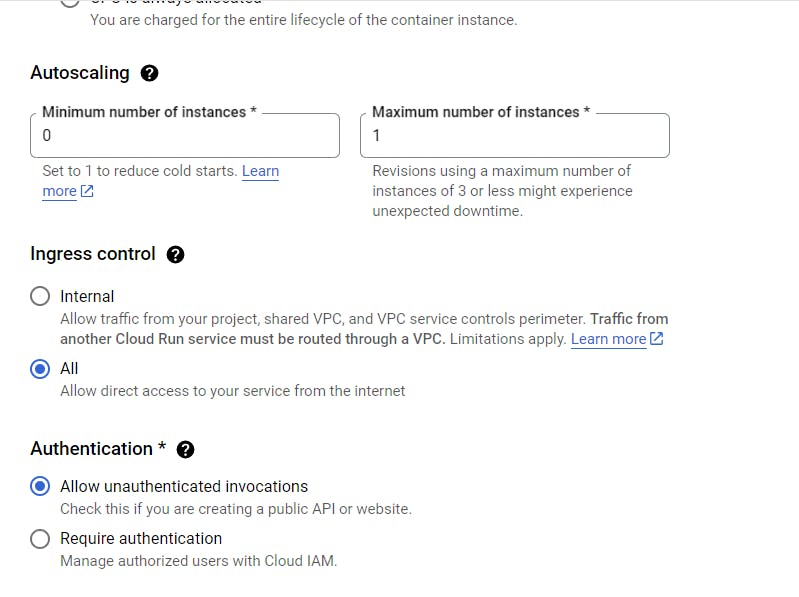
- In the "Container, Networking, Security" change the port value as per your application.

Click on "CREATE"
You can see a service is being created

Navigate to Cloud Build to check the progress of the trigger.
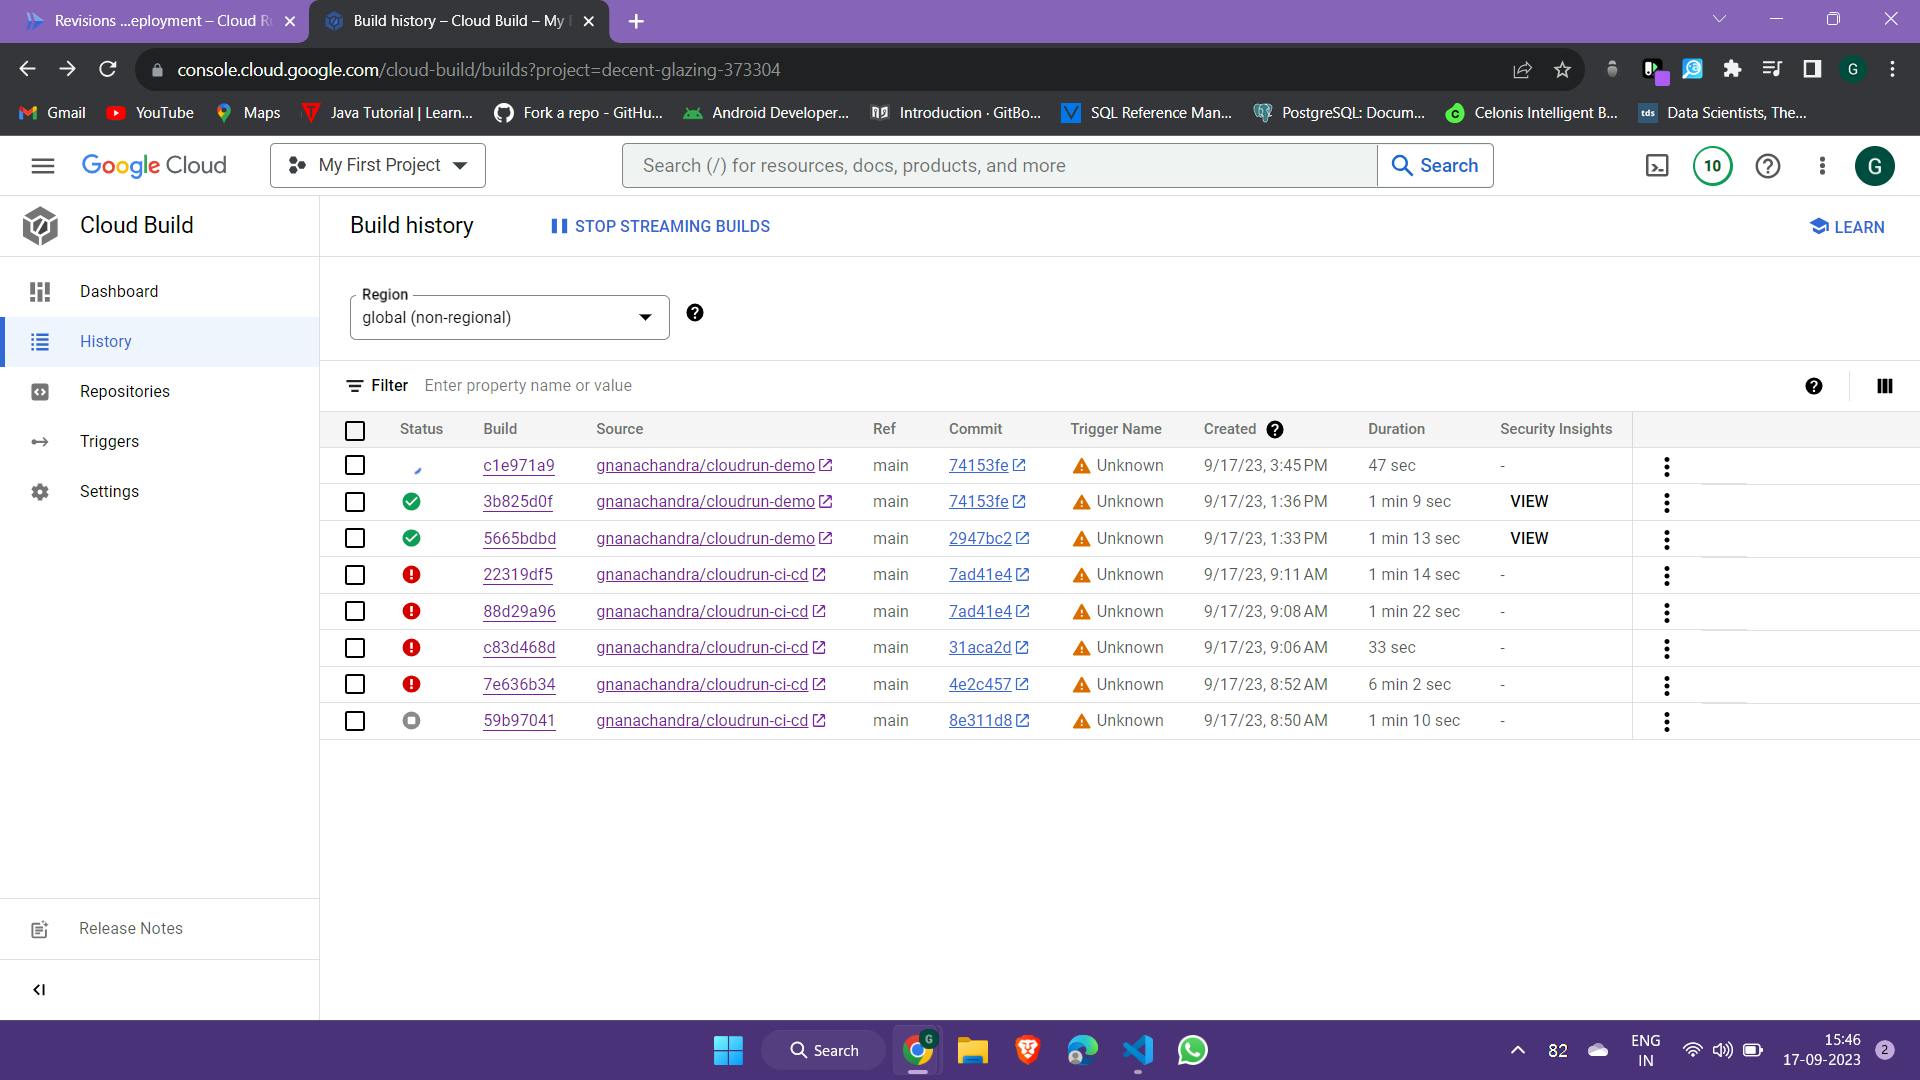
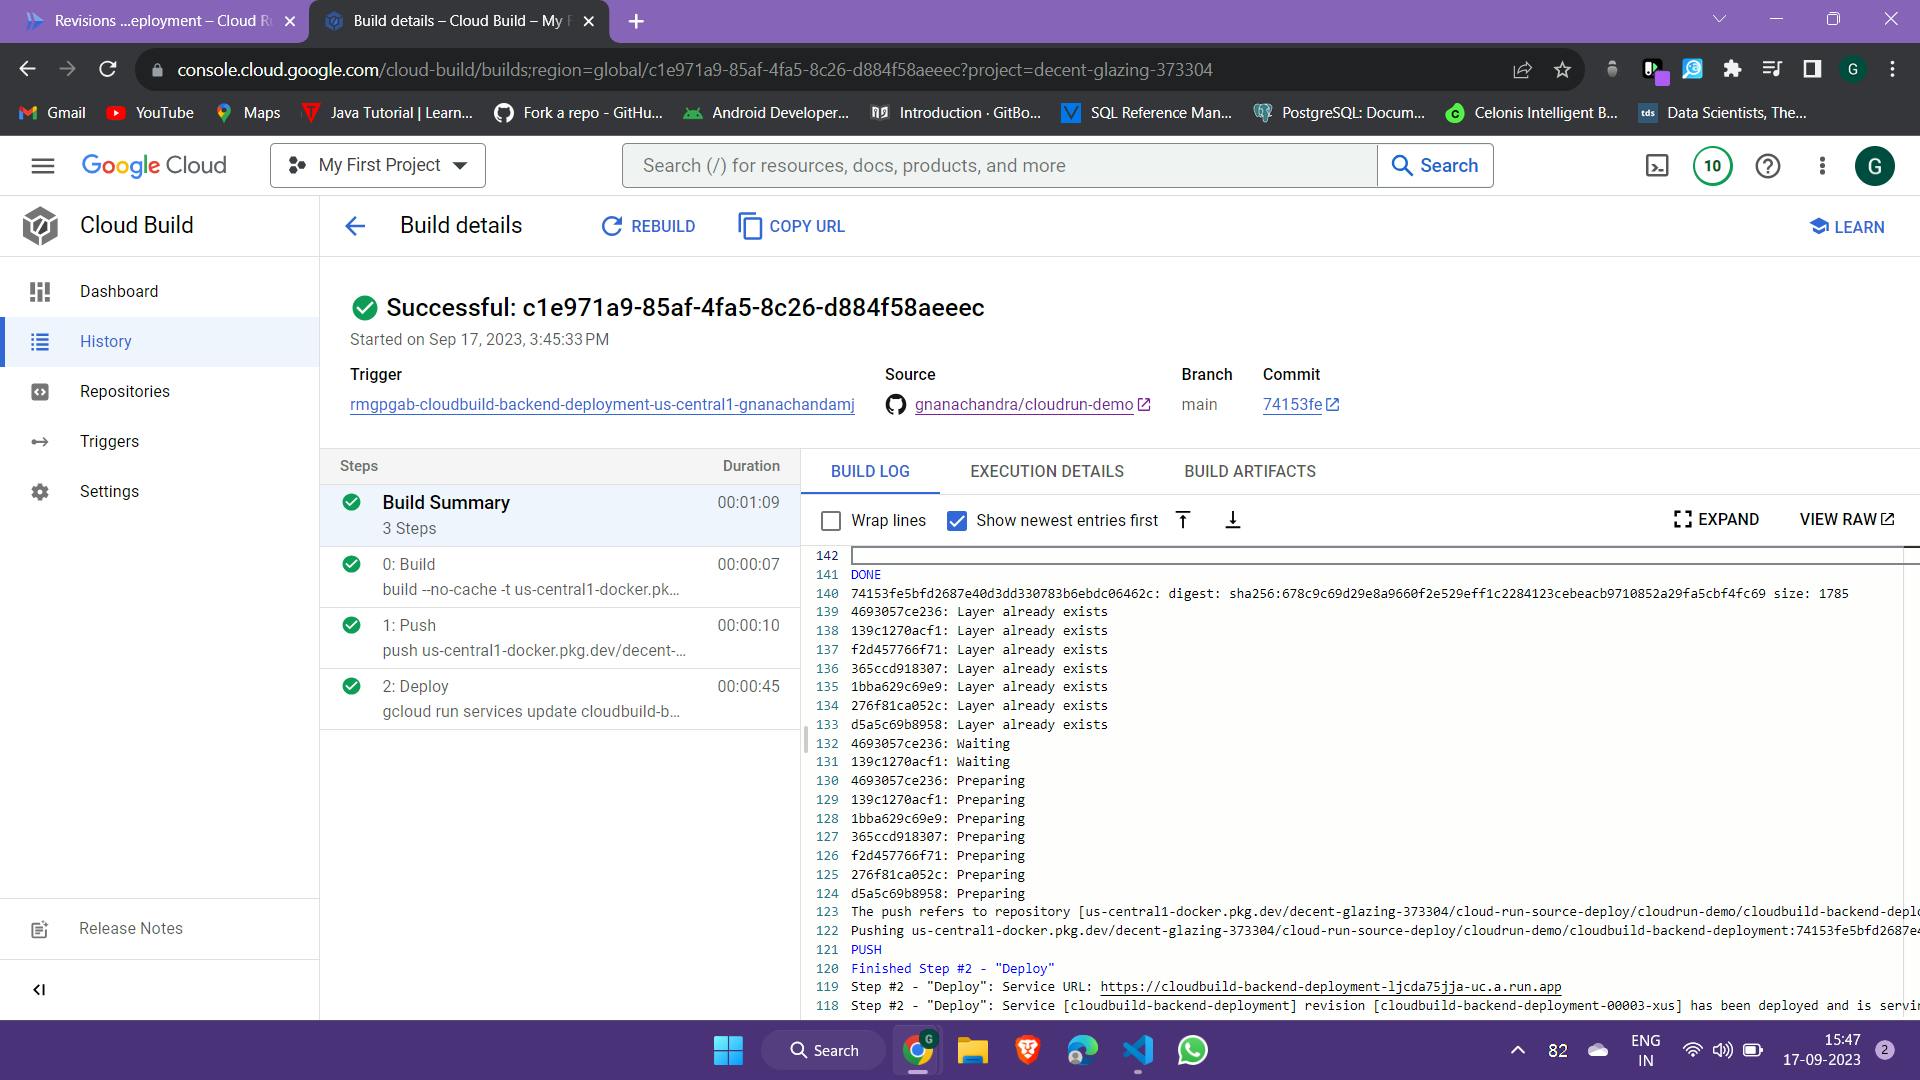
In the above image you can see that the build has been completed and the image is pushed to the artifact registry and successfully deployed to cloud run.

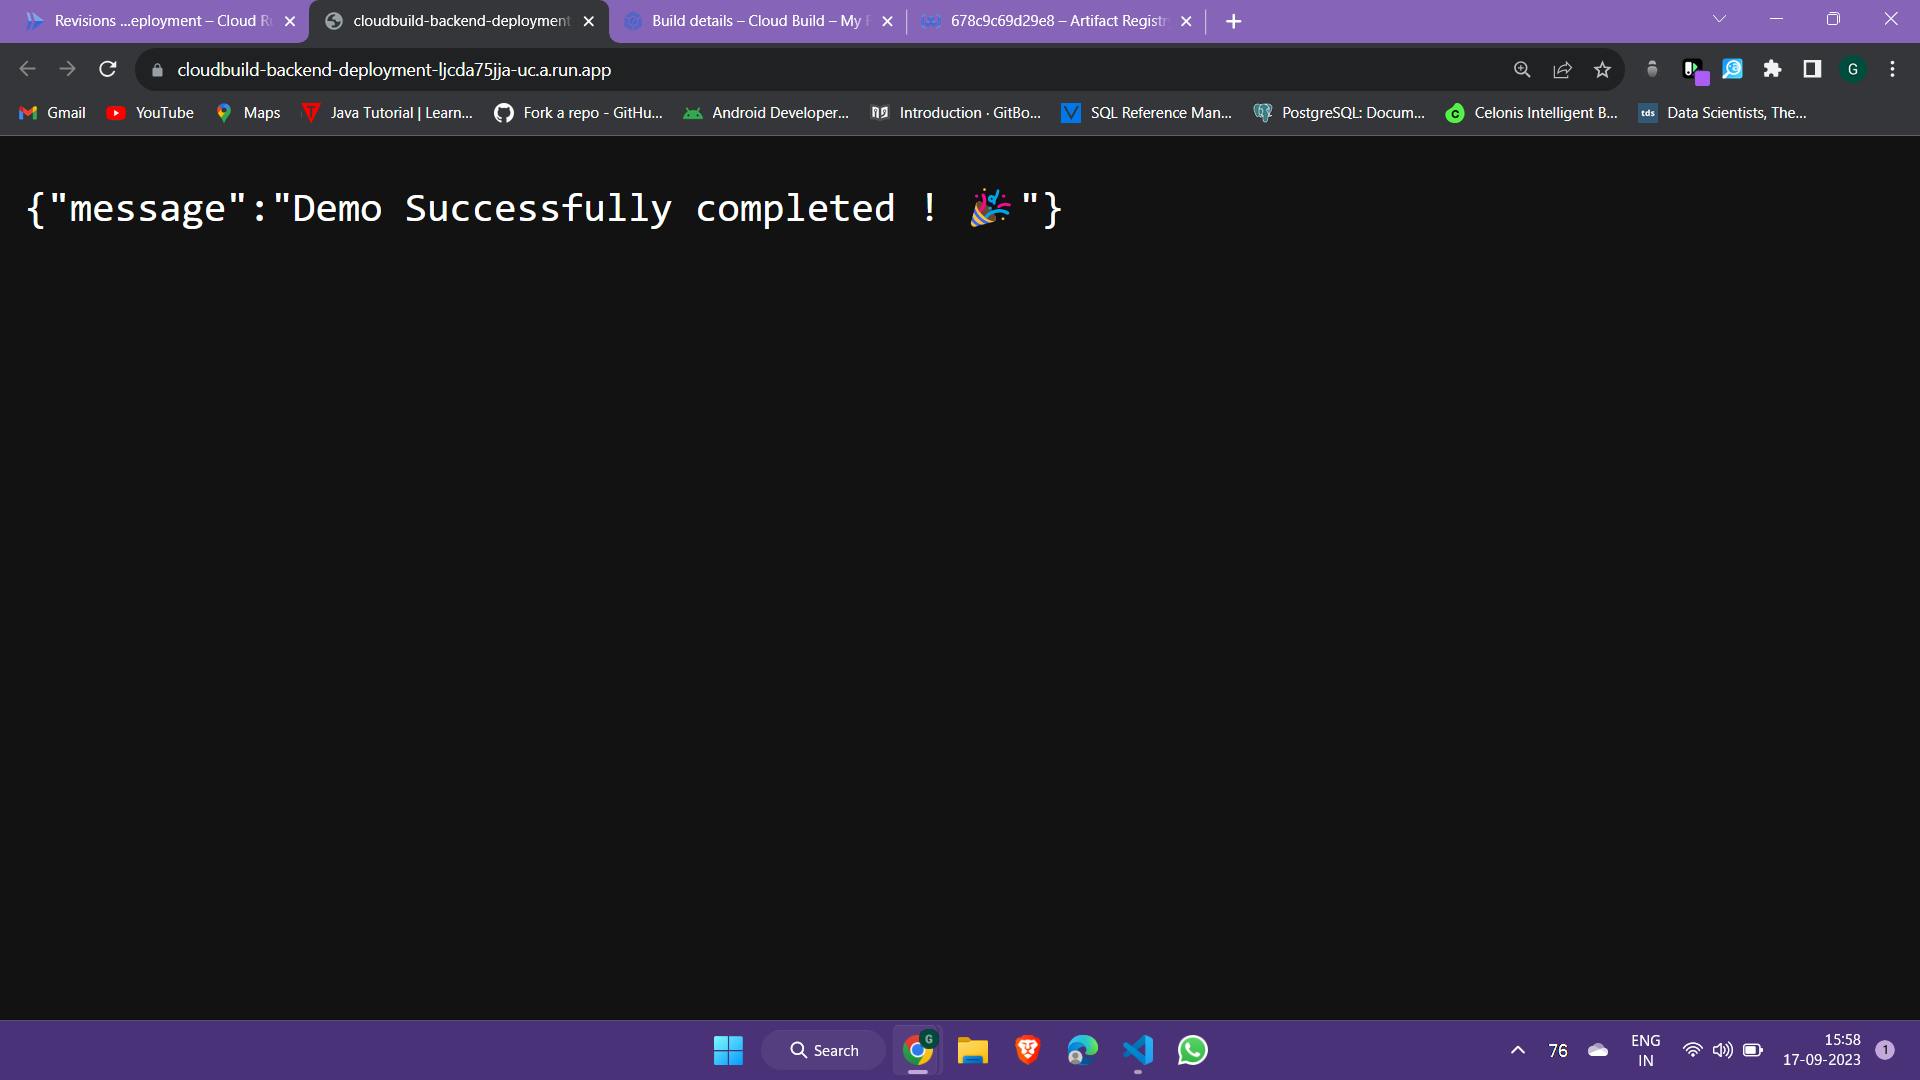
Visit Cloud Run services page to get the deployed link.
You can see that the application is up and running.

Making changes to the application
Change your application and push it to Github. you can notice that Cloud Build will start building the application as a docker image and pushes it to Artifact registry and deploys it automatically to Cloud Run.

A new version of the service is deployed to cloud run.
Conclusion
Congratulations on mastering the art of automated deployment with Google Cloud Run and Cloud Build! 🚀
NOTE : Please note that all the services featured in this guide are paid services, and they come with associated usage charges. It's important to be mindful of your usage to prevent unexpected costs. When you're finished with your project or no longer require these services, be sure to promptly delete or deactivate them to avoid any ongoing charges. The services used include Cloud Run, Artifact Registry, and Cloud Build.
Resources
Github Code : https://github.com/gnanachandra/cloudrun-demo
Deployed Link: cloudbuild-backend-deployment-ljcda75jja-uc..